Set the Custom Robot Tag Header Blog
Good evening, friend Wiendhy wiana, this time I will share tips about SEO about How to Set a Custom Robot Tag Header Blog.
This is because you can't add the robot.txt file on blogger. Custom robot header tags themselves serve to help search engines determine which parts of your blog you want to index and which parts you want to hide from Google search results.
1. Open the Blogger Dashboard and click on Settings
2. Then, click Search Preferences
3. There you will find crawlers and indexing and special robot header tags
4. Then, select the Edit button and click Yes
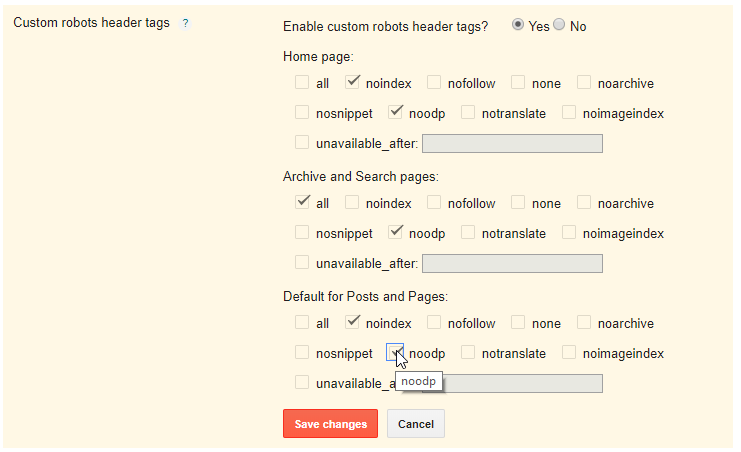
5. After that adjust the settings with the image below
6. When finished, click Save changes.
This is because you can't add the robot.txt file on blogger. Custom robot header tags themselves serve to help search engines determine which parts of your blog you want to index and which parts you want to hide from Google search results.
For those who do not understand correctly, I suggest not to tamper with this section and leave it like the blogger standard. Because if it's a little wrong, your blog or article will be indexed for a long time or not indexed at all.If you want to try it, just follow these steps:
1. Open the Blogger Dashboard and click on Settings
2. Then, click Search Preferences
3. There you will find crawlers and indexing and special robot header tags
4. Then, select the Edit button and click Yes
5. After that adjust the settings with the image below
6. When finished, click Save changes.


0 Response to "Set the Custom Robot Tag Header Blog"
Post a Comment